
Creative Mending - Featuring Handwoven Patches!
One thing I've enjoyed a lot in the last few years is learning more about how to mend my own clothes and the popularity that the "visible mending" movement has gained. If you haven't heard about this concept before, it's based on the idea that when your clothing gets stained or torn, instead of trying to hide that as a flaw you work to turn it into a feature! The movement is all about the celebration of visibly mending our clothing to inspire others not to throw out their own clothes just because something isn't perfect any more. Fashion waste is having a huge impact on the planet and wearing your clothes for as long as possible is one way to reduce waste and have a positive impact on our planet. I especially love the idea of "creative mending" because it doesn't require you to be a good enough sewist to hide a tear or stain. Making something look brand new again is difficult and requires having exactly the right materials and skills. On the other hand, just making something wearable again only needs a few basic materials and skills and lets you exert your own creativity on your clothing. Each tear and stain is a memory, and that too is something to celebrate! A creatively mended piece of clothing is now unique, it has a part of YOU in it. I like to imagine that's how our clothing grows a soul.
This blog post isn't intended to be a whole guide to how to mend your clothes, there are a ton of amazing resources out there on the internet, and I'll link a few of my favorite publications the bottom of this post. But I do want to give you readers just enough information and inspiration to give it a try yourself, especially if you're using one of my handwoven sew-on patches.
How to attach a sew on fabric patch
Step 0: Prepare your patch and clothing
First, you want to make sure that whatever you're sewing your patch onto is clean and ready to be mended.
Decide whether you'll be sewing the patch on by hand, or use a sewing machine. There are pros and cons to both methods. Obviously a sewing machine is faster, and the patch will likely be more secure due to the double thread and itsy bitsy stitch size a machine is capable of. But of course that requires you own a sewing machine, which not everyone does. Additionally, if your patch is going to be somewhere inconvenient to get to on a sewing machine (like the crotch of a pair of pants, or right on the cuff of a narrow sleeve) you might have more luck sewing by hand. Also, if you want your stitching to be decorative, you'll probably want to sew by hand to have better control over where your stitches move and what shape you make with them.
The next thing you need to decide is if you are going to leave the edges of your patch raw and visible, or if you are going to fold them under for a clean edge. Raw edges of fabric will fray slightly over time, but as long as they are sewed on correctly both methods should create a secure patch, so really it's just what you think would look better. Do you want the extra visual texture that frayed edges bring, or would you prefer a clean folded line?
My handwoven sew-on patches come with serged edges on all four sides, so your fabric wont fray even if you don't fold the edges under. However, I find that sewing through the folded edge does give your patch a little extra security.
Step 1: Position your patch
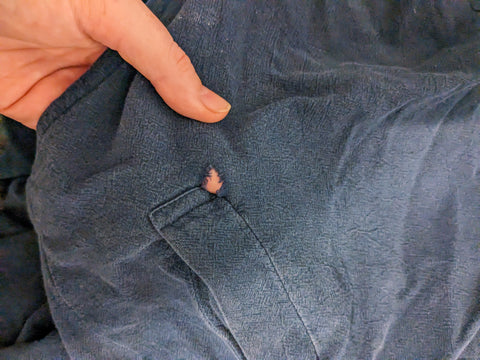
If you're mending a tear or hole, you want to make sure your patch is large enough that it fully covers the tear and that the cloth is stable enough to actually sew the patch in place. I like to use a patch that is at least 1/2" larger than the tear on *every* side. For example, if the hole in your pants is 1 inch wide, you want to make sure your patch is at least 2 inches wide so that when you center it over the hole you have 1/2" on each side.
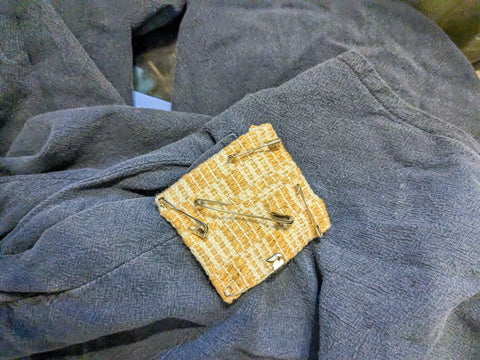
Pin your patch in place, using lots of pins pointing in different directions. If I'm going to be sewing the patch on by hand, I use safety pins so that I don't have to worry about poking myself as I manipulate the fabric. But if I'm going to be using a sewing machine, I use straight pins so that I can remove them as I go.
Step 2: Stitch it down
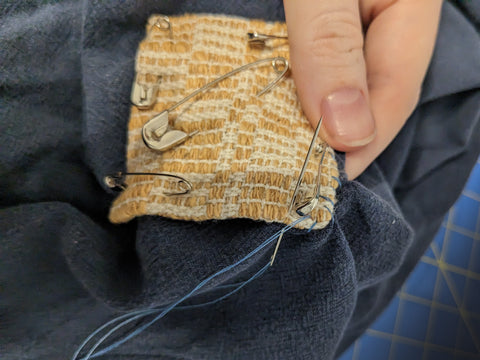
Starting in one corner, start stitching your patch to the base cloth, making sure you only go through ONE layer -- don't stitch your pant legs shut, or sew the front of your shirt to the back (yes, I have done this.)
If you are hand sewing your patch, I use a whip stitch or blanket stitch all around the edges. Once it's anchored in place, I do a running stitch back and forth across the patch to make it extra secure. This is the time when you can get creative and make your patch a true work of art. Consider using colorful embroidery thread to make your running stitch extra visible. Or maybe you'd like to sew in a specific shape instead of straight lines - put a heart or star or circle on your patch.

If you're using a sewing machine, use either a straight stitch or zig zag stitch as you sew around the perimeter of your patch. Once it's in place, do a few straight lines across the middle to stabilize it's position on the original fabric, and off you go!
Step 3: Wear your mended clothes with pride!
I know, you really thought this would be more complicated, but really that's it! Sure, there's fancier stitches you can use, and artistic ways to layer your patches. But I've got to leave something for the books I've linked below to teach you.
If you use one of my handwoven patches to mend or decorate your own clothes, send me a photo, and I'll send you a discount code for your next Kelly Wove It order!
Inspiration Gallery
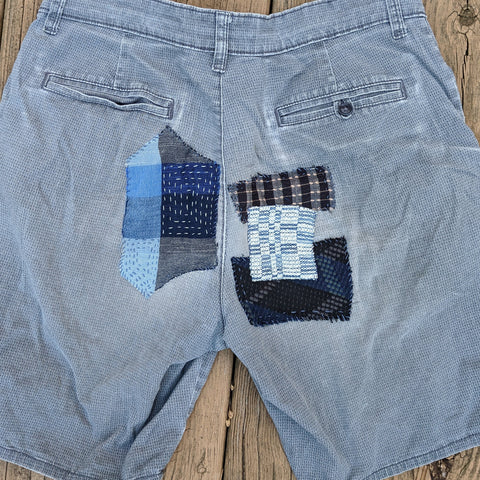
This is my favorite pair of shorts, as you can see by how much the seat has worn! I've used multiple techniques to bring together multiple pieces of fabric. The thinnest pieces of cloth got extra stitches to make sure they stayed secure in an area that, well, lets say gets lots of friction ;-P. I'll probably have to add another patch or two after this summer, but I love that!
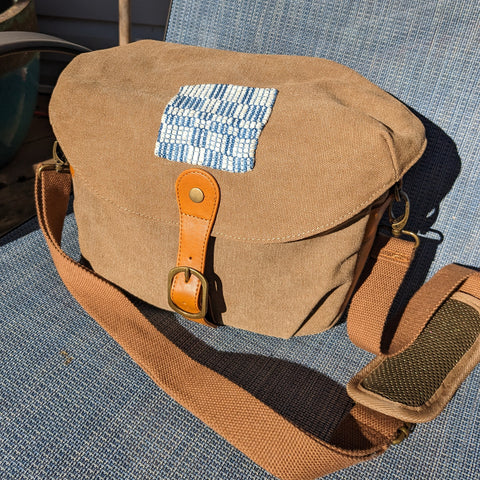
Here's my camera bag. This bag is in almost new condition as my camera doesn't really leave the house (I'm not much of a photography person, but I've had to learn to run this business). However, even if the bag is in perfect shape, I still thought the logo they put on the front was kind of ugly so I covered it up with a patch! You don't have to wait until something is torn or stained before you make it your own.
Here's some photos friends and family have shared with me after using my handwoven fabric to mend their own clothes!
Ann mended a favorite pair of sailing pants with handwoven scraps I sent her!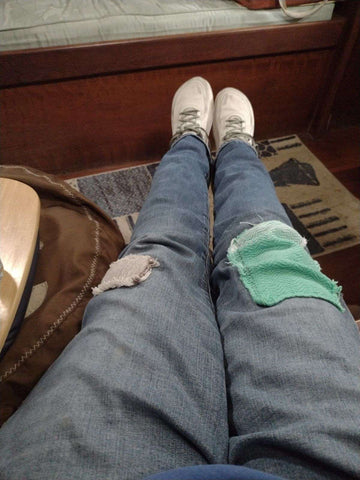

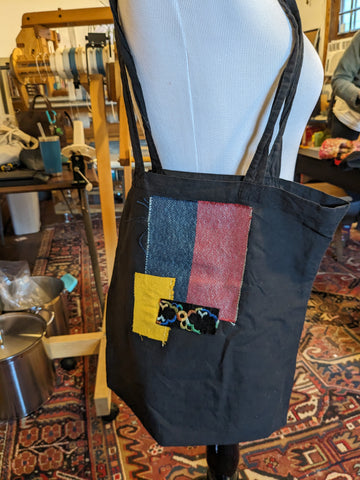
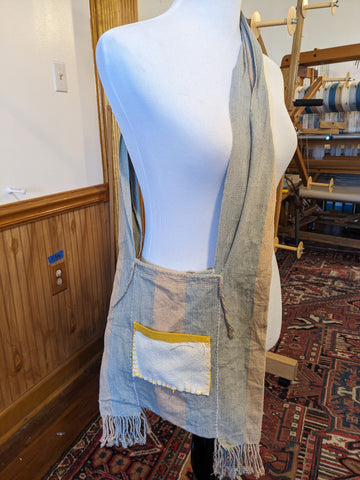
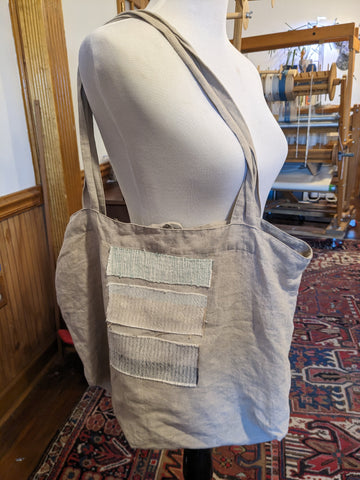
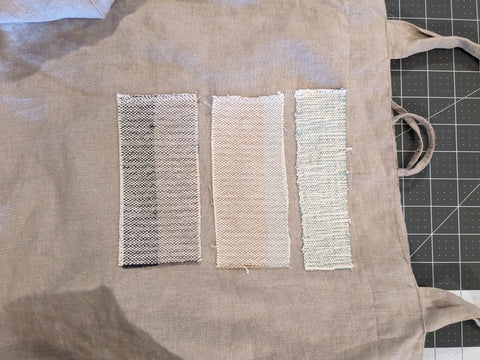
Deborah used my handwoven scraps to add interest to several tote bags she thought needed more decoration! You don't have to wait until something is torn before you make it your own. On the second photo of the blue and yellow bag, look how she's used a patch to add a new pocket to her bag! If you use an extra large patch and only sew it down on three sides you can turn your decoration into a functional pocket.
Do you have photos of things you've patched with my handwoven fabric? If you send them to me, I'll send you a coupon code to use on your next purchase. Thanks for supporting artists and makers, and showing how easy it can be to creatively mend what you love!
Other Resources:
Katrina Rodabaugh
www.katrinarodabaugh.com
Katrina Rodabaugh is an award-winning artist and writer working across disciplines to explore environmental and social issues through craft techniques. She has written two incredible books on the topic of creative mending, and teaches online and in person classes on techniques.
Bookhou Studio
www.bookhou.com
John Booth and Arounna Khounnoraj run an incredible business sharing their own creative powers focused on sustainable design and craft. Arounna has written and published three books with a focus on Textile design and processes, and her book Visible Mending is considered one of the best on the topic.
Creative Mending by Hikaru Noguchi
hikarunoguchi.com
As you can judge from the title, Creative Mending by Hikaru Noguchi is a great book that shares a lot of techniques and ideas.